방학때 기업 인턴을 했는데, 회사에서 macOS Native 앱 위에 Electron 앱을 얹을 계획이 있어서 일렉트론 앱과 네이티브 앱간 통신하는 방법에 대해 학습을 해야 했습니다!
제가 찾았던 방법은 총 두 가지가 있었는데요! 😮
- DeepLink 통신
- Local Server 통신
이 있었는데, 지금은 DeepLink만 설명해보겠습니다!
DeepLink
DeepLink란?
사용자를 특정 앱으로 이동시켜서 원하는 화면을 보여주거나, 사용자 액션을 유도하는 것(주소)
예시를 들어서 설명해볼게요!
Swift에서는
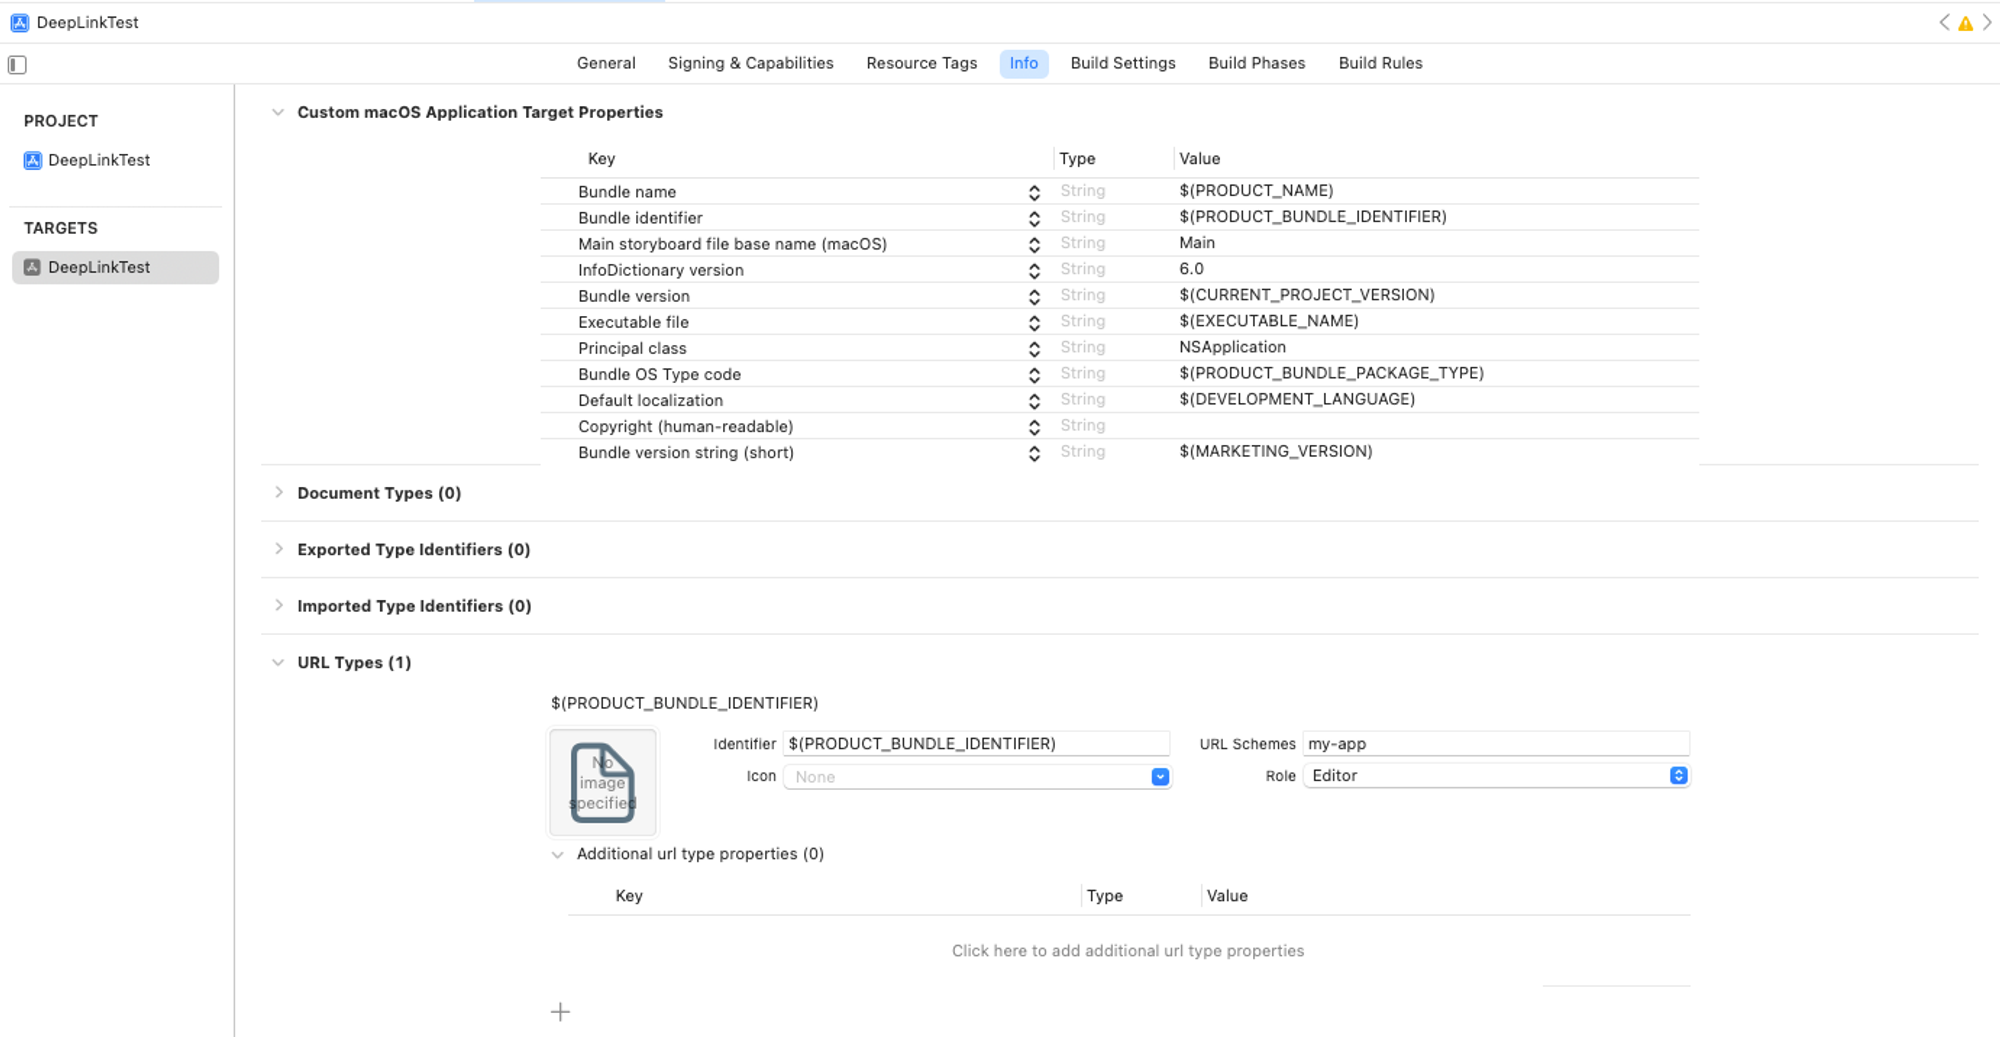
Targets → info → URL Types에서 custom scheme을 추가할 수 있는데요, 이렇게 custom scheme을 만들어 놓으면 my-app:// 을 주소창에 입력하거나 해당 주소로 요청을 보내면 앱을 실행시킬 수 있게 됩니다!
my-app:// 인 App Scheme 다음에 들어오는 부분을 Host라고 하는데요!
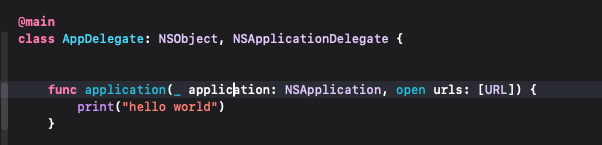
AppDelegate의 application 함수에서 host scheme에 따라서 다른 기능을 실행하게 할 수 있습니다!
func application(_ application: NSApplication, open urls: [URL]) {
        for url in urls {
            guard let components = URLComponents(url: url, resolvingAgainstBaseURL: true) else { continue }
            guard let scheme = components.scheme else { continue }

            switch scheme {
            case "my-app":
                if let host = components.host {
                    switch host {
                    case "update":
                        print("업데이트")
                    default:
                        print("알 수 없는 호스트")
                    }
                }
            default:
                print("알 수 없는 Scheme")
            }
        }
}이런 식으로 코드를 작성해놓으면 my-app://update URL 을 실행하면 Xcode 콘솔 창에 업데이트 가 나올것이고, 다른 Host를 입력하면 알 수 없는 호스트 가 나오겠죠?!
그렇다면 이제 일렉트론에서는 DeepLink가 어떻게 동작하는지 알아볼까요??
일렉트론 공식문서에서 DeepLink를 찾아 볼 수 있는데요!
아주아주 간단하게 코드를 살펴보겠습니다!
if (process.defaultApp) {
  if (process.argv.length >= 2) {
    app.setAsDefaultProtocolClient("electron-fiddle", process.execPath, [path.resolve(process.argv[1])]);
  }
} else {
  app.setAsDefaultProtocolClient("electron-fiddle");
}main.js에 해당 코드를 입력하면 이제 일렉트론 앱에서도 Deep Link가 동작하도록 할 수 있는데요!
"electron-fiddle" 로 되어있는 부분이 electron 앱의 url scheme 입니다!
deep link를 통해 일렉트론 앱에 접근하려면 electron-fiddle:// 을 통해 접근이 가능하겠습니다! 🥳
// macOS
  app.on("open-url", (event, url) => {
        // actions
});app.on("second-instance", (event, commandLine, workingDirectory) => {
// Someone tried to run a second instance, we should focus our window.
if (mainWindow) {
if (mainWindow.isMinimized()) mainWindow.restore();
mainWindow.focus();
}
// actionswindow와 macOS 운영체제 별로 deeplink를 통해 앱으로 들어왔을때 어떤 Host인지에 따라 요청을 처리할 수 있는데요!
macOS는 url 파라미터를 통해서 Host별로 분기 처리를 해줄 수 있고,
window & linux의 경우 commandLine.pop() 을 통해 Host를 가져와서 처리할 수 있습니다!
위 과정을 모두 수행하면
이런식으로 일렉트론 앱과 네이티브 앱간 DeepLink를 통해서 통신을 할 수 있게 됩니다 😏
주요 코드
Electron code
// main.js
...
const gotTheLock = app.requestSingleInstanceLock();

if (!gotTheLock) {
  app.quit();
} else {
  app.on("second-instance", (event, commandLine, workingDirectory) => {
    // Someone tried to run a second instance, we should focus our window.
    if (mainWindow) {
      if (mainWindow.isMinimized()) mainWindow.restore();
      mainWindow.focus();
    }
    // the commandLine is array of strings in which last element is deep link url
    dialog.showErrorBox("Welcome Back", `You arrived from: ${commandLine.pop()}`);
  });

  // macOS
  app.on("open-url", (event, url) => {
    dialog.showErrorBox("딥링크가 동작했어요.", `You arrived from: ${url}`);
  });
}// index.html
...
<a href="my-app://update">Click here to launch the app</a>
...Swift code
@IBOutlet weak var deepLinkButton: NSButton!
    @IBOutlet weak var myLabel: NSTextField!
    override func viewDidLoad() {
        super.viewDidLoad()
        myLabel.stringValue = "딥링크 테스트입니다."
    }
    @IBAction func openUrl(_ sender: Any) {
        if let url = URL(string: "deeplink://") {
            NSWorkspace.shared.open(url)
        }
    }
'Swift' 카테고리의 다른 글
| [Swift] 비동기와 async/await (4) | 2024.12.13 |
|---|---|
| [Swift] Core Data 기본(Core Data Stack과 NSManagedObjectContext) (1) | 2024.11.17 |
| [Swift] 서브스크립트(subscript)에 대해 알아보자! (3) | 2024.08.23 |
| [Swift] Struct vs Class (1) | 2024.08.22 |
| [Swift] Picker 숫자에 간격 주기 (1) | 2024.08.02 |